v0.1 - Hello Vue and Browser Extension
Unzip
Alright, now that we have everything installed. Lets start on the project itself!
Unzip the file you downloaded above and open it in your editor.
In that folder you should see some files, including a index.html and index.css file.
Open the index.html file.
Whats in here?
Working from the top here we have our Font, loaded in from Google.
CSS Reset, this just fixes some annoying compatibility issues in CSS across browsers.
Milligram CSS Framework, which gives us a basic column layout, and simple css styling with a very small footprint. I have changed the primary and secondary colors to match Vue.js's branding.
Moving down to the very bottom we can see we have Vue.js loaded in via unpkg, which is a handy CDN (Content Distribution Network) that hosts everything on NPM (Node Package Manager).
Mounting Vue
The very first thing we need to do is create an element that Vue can mount onto.
So as the first child of the body tag we will create a div with the id 'app'
<div id="app">
</div>
This gives us a spot for Vue to attach itself. This element is the parent of our entire application, everything that we write in all our components will live inside this element.
Lets go ahead and create the javascript file that will house our application.
Call it app.js, once you have created it lets make sure it is referenced in the index file below where we are importing Vue.js. We need to use Vue in this file so if it is loaded before Vue we will get an error.
Make sure that this at the bottom of the body element. If the HTML we are binding to doesn't exist yet Vue will throw an error.
index.html
<body>
    <div id="app">
    </div>
    <!-- Vue.js -->
    <script type="text/javascript" src="https://unpkg.com/vue@2.6.7/dist/vue.js"></script>
    <script type="text/javascript" src="app.js"></script>
</body>
Lets open up the app.js file and initialize our instance of Vue. We do this by using the new keyword and supplying an object as the first argument. We want to tell Vue which element to attach itself to, so we give it the option el with the value #app which tells it to attach to an element with the id of app
app.js
const app = new Vue({
    el: '#app'
})
Actually doing something
We want to actually do something with Vue though right? Lets go back to the index.html file and create a template string. Template strings allow us to write to the page from Vue. We use double curly braces to reference the data. Lets put it in an h1 element so its big.
index.html
<div id="app">
    <h1>
        {{message}}
    </h1>
</div>
If we refresh the page we wont see anything special. Just our template variable at the top left. This is because we haven't set the message in Vue. So lets jump back to app.js and set the message to whatever you want.
app.js
const app = new Vue({
    el: '#app',
    data: {
        message: 'Good morning, have a 🥐'
    }
})
If you refresh you should now see your message on the index page.

Vue Browser Extension
This allows us to look at the state of our Vue.js app and see what is going on inside. It is extremely useful.
Chrome
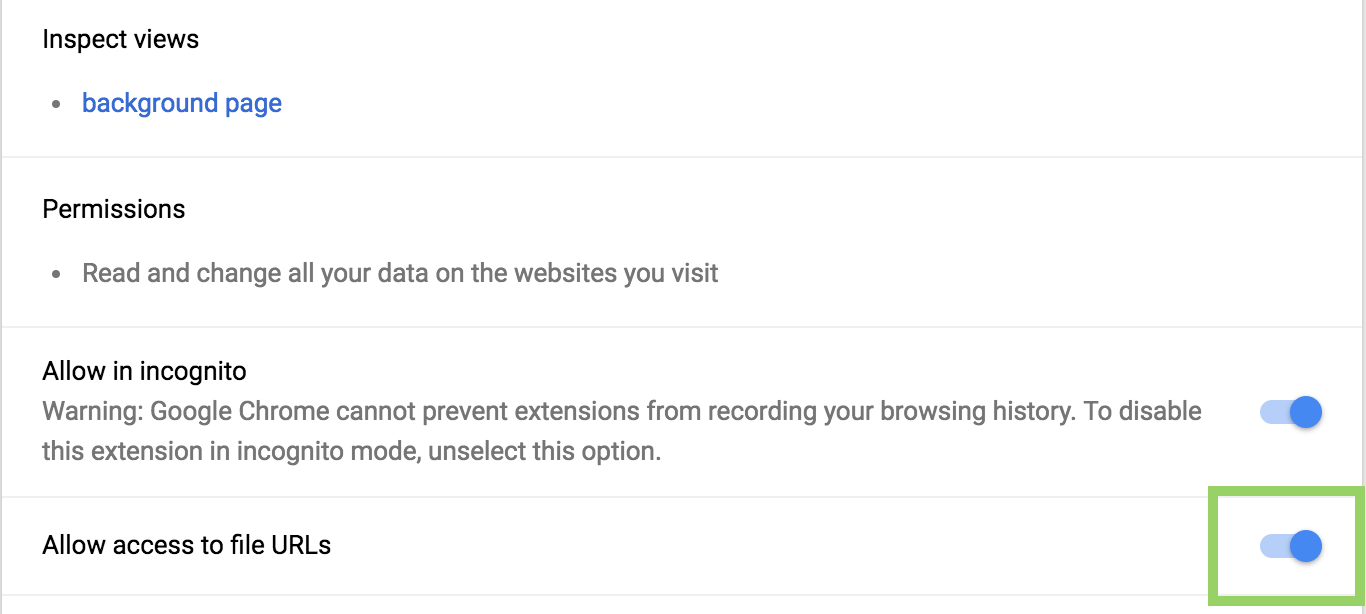
To get our Vue extension working, we need to give it access to the page when we just have our html file open.
In Chrome go to chrome://extensions and click on the Vue Dev Tools extension. Near the bottom of that page you will see an option for Allow Access to File URLs.
Go ahead and flick that on.
